We played a game of The Men Who Would be Kings today, featuring a force of British infantry and imperial cavalry trying to run a gauntlet of Zulus. I had originally intended to run this game at Millennium Con, but had to cancel my trip, so we played it at Myth Adventures instead.
Pics and a game summary below. Short version: The British lost, badly!
 |
| The set-up: 6x4 table, with 4 units of British infantry and 2 of irregular cavalry (Natal Native Horse and Frontier Light Horse). Zulu forces would arrive from the side table edge AND from behind the British. A difficult creek runs through the middle. |
 |
| The Zulus approach! Part of a married regiment seen here. |
 |
| The imperial horse units take the hill and form a loose firing line. Overall in the game, the cavalry units performed better than the thin red line. |
 |
| The perimeter. So neat and tidy. A shame considering what happens to it later! |
 |
| Zulus cresting the hill opposite the imperial horse. |
 |
| My favorite unit, the Natal Native Horse, open fire at long range. |
 |
| The Frontier Light Horse were the stars of the battle. They'll ultimately inflict at least a dozen casualties on the Zulus, survive several assaults, and be some of the few survivors to ride out. |
 |
| The Zulu pursuit forces approaching from behind. |
 |
| The Natal Native Horse redeploy to face the new threat. |
The Zulu assault goes splendidly. Four units of British infantry barely managed to inflict 5 or 6 casualties, at effective 12" range, and only pin a single attacker. The Zulu assault crashed into the British lines and smashed them.
 |
| Not all was over, however. The Frontier Light Horse held against Zulu attacks and the damaged British units managed some effective fire that slowed the Zulu follow-up charges. |
 |
| The end approaches. The Zulus started to pick off British infantry units. The NNH on the left were able to make a run for it. |
 |
| Falling back through volleys of spears and musketry, the Frontier Light Horse roughly handled one more Zulu assault and managed to fall back through a ring of enemy units. |
 |
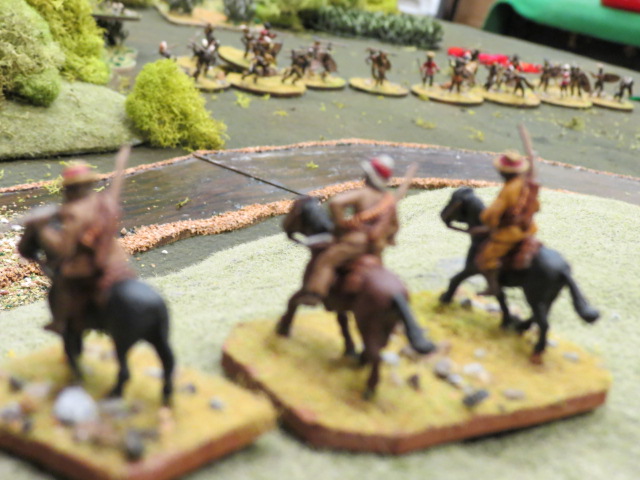
| The only survivors of the British force, running for their lives. |
Thanks for looking!


No comments:
Post a Comment